The Most Innovative Things Happening With Best Entry Home Doors
The Main Principles Of Exterior Prehung Doors
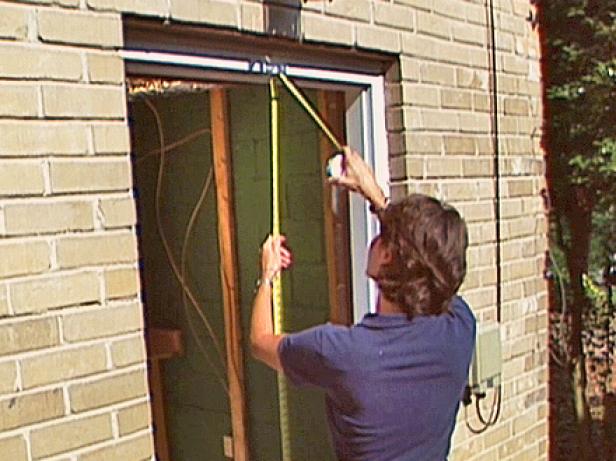
Got a door that's due for any upgrade? Watch to discover how to set up a prehung outside door. Find detailed job details here: to get more information about installation services through Lowe's.
Changing an exterior door with one that has energy-efficient insulation, weather stripping and an easy-to-maintain baked enamel guide coat can significantly improve the comfort, security and look of your house. Since replacement alternatives are usually pre-hung with jambs, brick moulding and hardware (other than locksets), installing an exterior door can be a challenging project.
Using a hammer and a flat screwdriver, get rid of the hinge pins and lift out the old door. Loosen the hinges from the door. Next, unscrew the hinge leaves and eliminate them from the jamb; keep the old hinge sets together, consisting of all screws, hinge leaves and hinge pins. Utilizing an utility knife, score the caulking in between the molding and the brick to break the seal.
The front door is often the very first product up for assessment by visitors to your house. If the front door looks great, opportunities are your visitor will have a favorable impression of the home from the outset. If you have an older door, or a door that is damaged, replace it with a new one to provide you house a well looked after appearance and much better efficiency.
You just require the same size of door without the hinge cutouts. You don't require unique tools, you can cut the hinge mortise with a chisel and a hammer. Remove the old door from the jamb. Use a cordless gun to unscrew the hinges from the jamb. Leave the depend upon the door.
Install Prehung Doors for Beginners
Eliminate the doorknob. Location the new door on top of the old door with the outside side down. Make sure the doors are flush with each other around the boundary of the door. Use a pencil to trace the locations of all three hinges from the side of the old door to the brand-new door.
You utilize them again on the brand-new door. Remove both doors from the sawhorses. Stand the new door on it's side with the hinge side facing up. Clamp it to one of the sawhorses with a hand clamp. Place the hinges on the door as if they were already set up on the door utilizing the pencil lines to align them.
Cut around the tracings with an utility knife to a depth of 1/8 inch. Hold a sculpt with the bevel side up, horizontally at the side of the door. Press and rock the sculpt backward and forward throughout the grain inside the hinge tracings to get rid of all of the wood from the inside of the tracings to a depth of 18 inches.
Place the hinge plate into the hinge cut-outs. If they do not fit flat, or will not suit the tracings, continue cutting and shaving the cutouts up until the hinge plates healthy snug and flush into the hinge cutouts, called mortises. Screw the hinges to the door using the old screws and the cordless screw gun.
Tap the hinge plates back into the jambs. Utilize the screw gun to screw the hinges onto the jambs. Put the doorknob on. Initial Source: class="et_bloom_bottom_trigger"> .
The Best Strategy To Use For Install An Exterior Prehung Door
Location the jamb in the opening, and after that remove the securing screws or short-term lock. Insert two shims at the top of the jamb on opposite side of the head jamb. These 2 shims will safely secure the jamb and the door in the opening (Fig. 5). Adjust the top of the jamb so that it is flush with both sides of the wall-- or get more info as close as flush as possible, so that installing the mitered casing will be simpler (Fig.
 The Facts About Prehung Exterior Doors Revealed
 Not known Facts About Prehung Exterior Doors
Set up the first five fasteners in specifically the correct places and in exactly the right order. Otherwise, you may not have the ability to adjust the door properly. * Note: In this training example, we are driving screws through pre-drilled counter-sunk holes in the face of the jamb. Rather, drive 15ga finish nails at each place, or drive screws close to the shoulder of the lower rabbet, where the kerf-in weatherstripping will hide the screws.
7). Do not shim behind Fastener # 1. Shims are currently set up at the top of the jamb. Fastener # 2Drive fastener 2 up near the top of the strike jamb-- as high up on the http://query.nytimes.com/search/sitesearch/?action=click&contentCollection®ion=TopBar&WT.nav=searchWidget&module=SearchSubmit&pgtype=Homepage#/residential home entry doors jamb as possible (Fig. 8). Do no shim behind Fastner # 2. Shims are already installed at the top of the jamb.
However prior to driving fastener # 3, correct any remaining cross-leg. Move the bottom of the hinge jamb in or out of the wall till the door is lying flat versus the strike jamb. If the jamb is significantly cross-legged, do not try to remedy it completely on the hinge jamb-- you can still remedy cross-leg prior to driving fastener # 4 (this is particularly crucial with pairs of doors).
Fastener # 4Fastener # 4 need to be driven at the extremely bottom of the strike jamb, as near to the flooring as possible (Fig. 10). But prior to driving fastener # 4, remedy any remaining cross-leg. Move the bottom of the strike jamb in or out of the wall till the door is lying perfectly flat versus the strike jamb.
The Greatest Guide To http://wabbitfbkt779.institutoalvorada.org/enough-already-15-things-about-front-entry-doors-at-home-depot-we-re-tired-of-hearing Prehung Doors
In http://edition.cnn.com/search/?text=residential home entry doors order to maintain a constant and appropriate strike space around 1/8 in., you might require to insert an additional shim to support the jamb before driving fastener # 4. Fastener # 5Fastener # 5 fixes a serious issue with prefit doors-- especially heavy prefit doors. The weight of a door will pull down on the leading hinge, positioning the leading hinge under stress.
11). If the hinge gap above the top hinge is not remedied, it perhaps not be possible to fix the strike space and the door might rub against the strike jamb. To eliminate the tension on the leading hinge and jamb, change one of the leading hinge screws with a screw enough time to penetrate the jamb and the wall framing (Fig.
To alleviate the stress on the leading hinge and jamb, replace one of the top hinge screws with a screw long enough to permeate the jamb and the wall framing (Fig. 12). Do not torque this screw excessive or the door will be jamb bound. A minor quantity of pressure on that screw will remedy the top hinge gap (Fig.
 Top Guidelines Of Prehung Doors
And in the future, that screw can be loosened up or tightened up to correct the fit of the door in the event the home settles.
DAVID TAYLOR IMPROVEMENT SET UP SALES SETUP SPECIFICATIONS OUTSIDE PREHUNG DOOR REPLACEMENT GENERAL PROVISIONS: Charge tax on Merchandise YES Charge tax on Installation Labor NO Measurement Required YES Installer Delivery Readily Available YES Store/Millworks Delivery Avail YES https://en.search.wordpress.com/?src=organic&q=residential home entry doors Delivery Retail (varies) An exterior pre-hung door system includes a door slab cut and prepped with a doorknob bore, installed with hinges in a jambs frame correctly sized for the wall opening, with brickmold and casing molding.